If you’ve just got yourself an Aroma Digital Rice Cooker, or maybe you’ve had one sitting on your kitchen counter for a while but never really dug into how to use it properly, this guide is for you. Honestly, rice cookers can be a bit intimidating at first—so many buttons, settings, and little accessories—but once you get the hang of it, it’s like having a kitchen assistant that never complains.
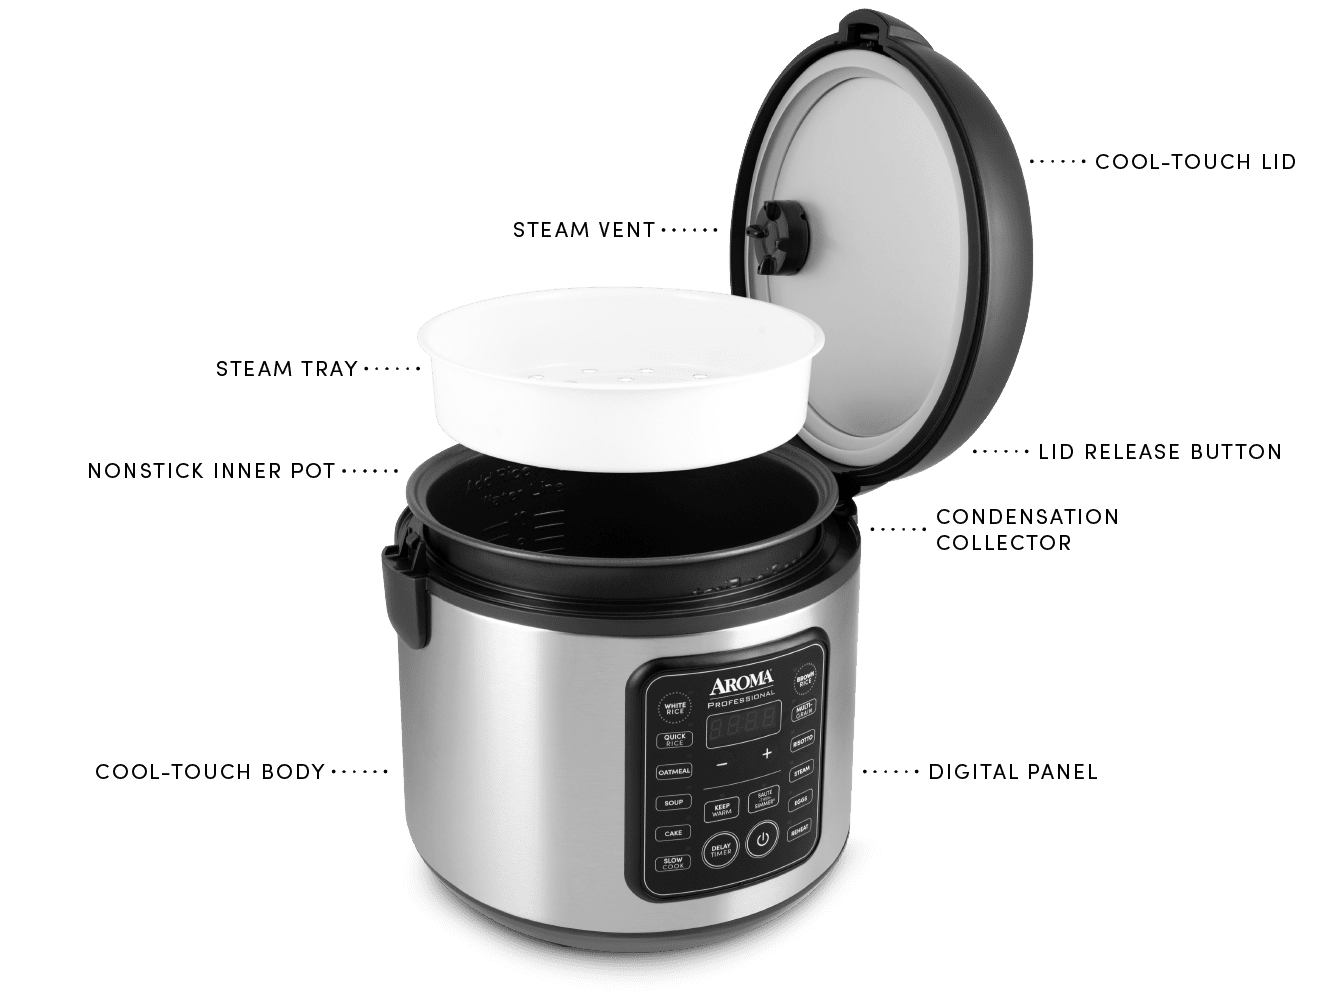
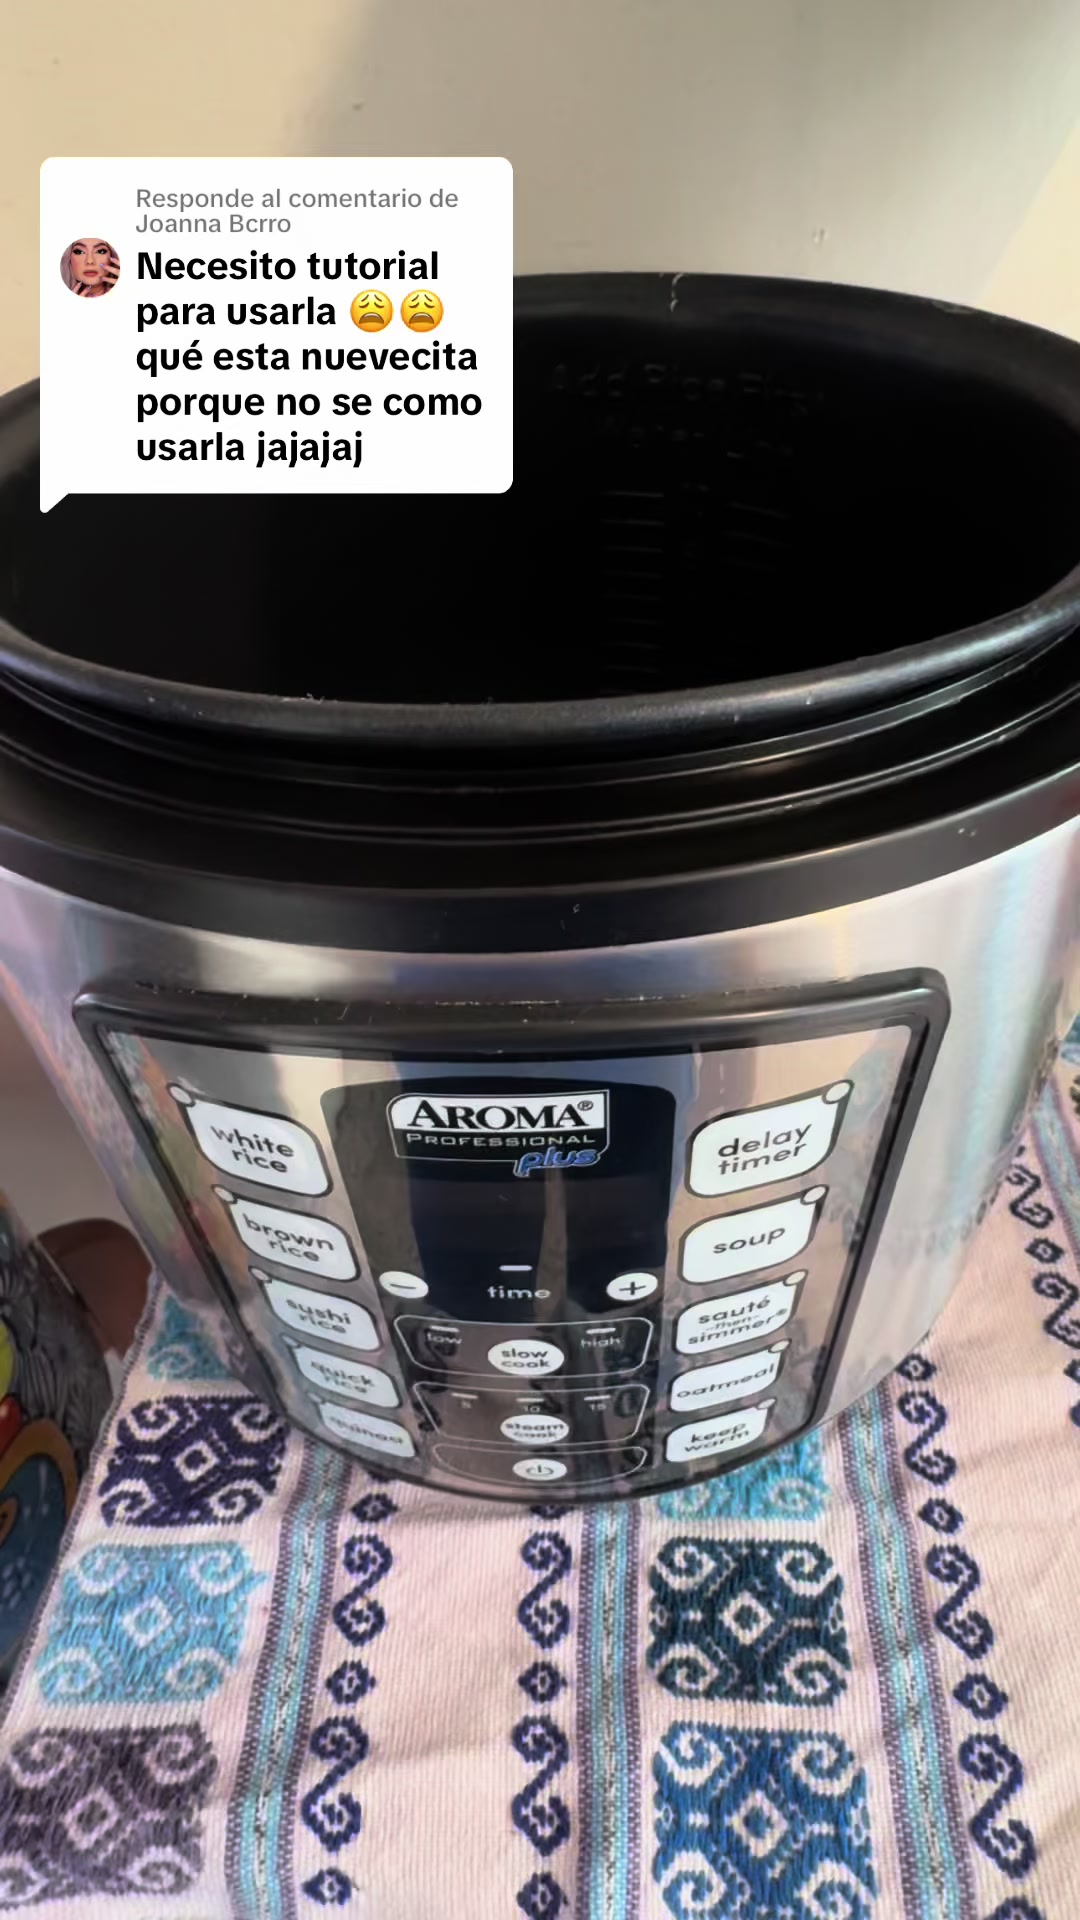
First off, let’s get familiar with the cooker itself. The Aroma Digital Rice Cooker usually comes with a nonstick inner pot—that’s the part where you put your rice and water. It’s removable, which makes cleaning a breeze, though you’ll want to be gentle to keep that coating intact. Then there’s the lid—some models have a locking lid, others a glass one so you can peek inside without opening it. The control panel is where the magic happens: buttons for White Rice, Brown Rice, Steam, Delay Timer, and Keep Warm. Plus, you get a measuring cup and a rice spatula, which might seem minor but trust me, they’re designed to make your life easier.
Now, let’s talk rice. The first step is measuring your rice with the provided cup. Don’t just eyeball it—this little cup is a bit smaller than your regular kitchen cup, so it’s best to stick with it for consistent results. Rinse your rice under cold water until the water runs clear. This step is key because it washes away excess starch, which can make your rice gummy if you skip it.
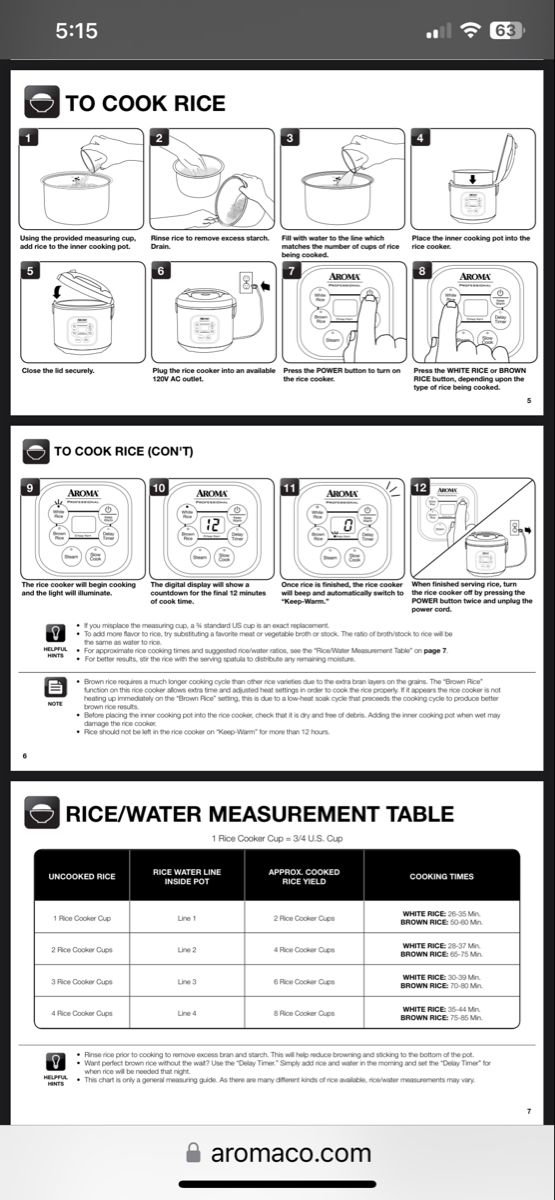
Once rinsed, add the rice to the inner pot, then fill with water up to the line that matches the number of cups of rice you’re cooking. For example, if you’re cooking cups of rice, fill water to the “2” line inside the pot. It’s simple but important to get right. Here’s a quick reference:
| Rice Quantity (cups) | Water Level (lines in pot) | Water Amount (approx.) |
|---|---|---|
| 1 | 1 | ml |
| 2 | 2 | ml |
| 3 | 3 | ml |
After that, pop the inner pot back into the cooker, close the lid firmly, plug it in, and hit the power button. Choose your cooking mode—White Rice if you’re cooking regular rice, or Brown Rice if you’re going for something heartier. The cooker will start, and you’ll see a little blinking pattern on the display. It’s basically telling you, “I’m working on it!” When it’s done, it switches to Keep Warm mode automatically and usually beeps to let you know.
One thing I love about this rice cooker is the Delay Timer feature. It’s a lifesaver if you want to prep your rice ahead of time and have it ready exactly when you want it. Say you’re leaving for work in the morning but want fresh rice waiting when you get home—just set the delay timer for the number of hours you want to wait, and the cooker will start on its own. You can set it up to hours ahead, which is pretty flexible.
Steaming is another great function that often gets overlooked. You can steam veggies, fish, or dumplings while your rice cooks underneath, making dinner prep so much easier. Just add 2- cups of water to the pot, place the steam tray inside, arrange your food, close the lid, and hit the Steam button. You can adjust the steaming time from to minutes, depending on what you’re cooking. Just be careful when removing the steam tray—it gets hot!
And here’s a little bonus: you can cook rice and steam food simultaneously. It’s like a two-for-one deal. Put your rice and water in the pot, place the steam tray with your veggies or fish on top, select the rice cooking mode, and let the cooker do its thing. When it’s done, you’ll have a perfectly cooked meal with minimal effort.
Some models even have slow cook and sauté-then-simmer functions. So, if you’re feeling adventurous, you can use your rice cooker for soups, stews, or even browning ingredients before slow cooking. It’s surprisingly versatile.
Now, about cleaning—don’t skip this part. Always unplug the cooker before cleaning. Take out the inner pot and wash it with warm, soapy water using a soft sponge. Avoid scrubbing with anything abrasive because you don’t want to ruin that nonstick surface. The steam tray and lid should be cleaned regularly too. Just wipe the cooker’s exterior with a damp cloth and never submerge the base or cord in water.
Sometimes things don’t go perfectly. If your rice comes out undercooked, it’s usually because there wasn’t enough water or the cooking time was too short. Mushy rice? Probably too much water or overcooked. If the cooker won’t start, check the power connection. And if you see error codes, make sure the lid is closed properly or try resetting the cooker.
Here are some FAQs that might clear up other questions you have:
Q: Can I use my own measuring cup instead of the one that came with the cooker?
A: You can, but the cooker’s cup is a bit smaller than a standard cup. Using your own might throw off the water-to-rice ratio, so it’s best to stick with the one provided for consistent results.
Q: How do I cook different types of rice?
A: Use the White Rice button for regular white rice and the Brown Rice or Multigrain button for brown rice or wild rice. Adjust water amounts accordingly.
Q: Can I steam food and cook rice at the same time?
A: Absolutely! Just place your rice and water in the pot, put the steam tray with your food on top, and select the rice cooking mode.
Q: How do I clean the nonstick inner pot?
A: Wash it gently with warm, soapy water and a soft sponge. Avoid metal utensils or abrasive cleaners.
Q: What’s the delay timer for?
A: It lets you set the cooker to start cooking later, so your rice can be ready exactly when you want it.
Here’s a quick rundown of water-to-rice ratios and cooking times for different rice types:
| Rice Type | Water Ratio (per cup) | Cooking Time (approx.) | Button to Use |
|---|---|---|---|
| White Rice | 1:1 | 30- minutes | White Rice |
| Brown Rice | 1:1.5 | 45- minutes | Brown Rice |
| Multigrain | 1:1.5 | 50- minutes | Multigrain |
To wrap it all up, once you get comfortable with your Aroma Digital Rice Cooker, it’ll quickly become one of your favorite kitchen tools. It takes the guesswork out of cooking rice and steaming food, saving you time and effort. Plus, with features like the delay timer and multiple cooking modes, it’s flexible enough to fit your busy lifestyle. Just remember to rinse your rice, measure carefully, and clean up after each use, and you’ll be rewarded with perfectly cooked meals every time.
If you want to experiment or need recipe ideas, don’t hesitate to explore different grains or try steaming various veggies and proteins. The Aroma cooker is more than just a rice cooker—it’s a versatile little helper that can make your cooking routine easier and more enjoyable.