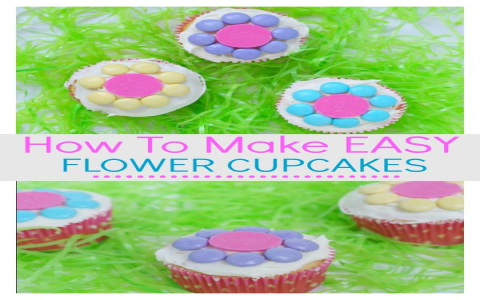
How to Make a Flower on a Cupcake: Easy Step-by-Step Guide
There's something magical about a cupcake crowned with a delicate, edible flower. Whether for a party, a gift, or just to treat yourself, learning how to make a flower on a cupcake turns simple baking into an artistic delight. In this guide, I’ll walk you through every detail, sharing rich insights and useful tips to help you create cupcake flowers that look stunning and taste delicious. Let’s unwrap the art of edible floral decoration!
Why Make Flowers on Cupcakes?
Flowers instantly elevate the look of cupcakes, offering a natural, elegant appeal without the need for fancy equipment or techniques. Aside from visual joy, decorating cupcakes with flowers allows customization by season, occasion, or personal taste. From brides seeking a botanical charm at weddings to parents making birthday treats unforgettable, flowers bring a unique touch that pleases guests and bakers alike.
Benefits of Floral Cupcake Decoration:
- Easy way to personalize cupcakes
- Variety of styles: classic roses, daisies, succulents, and more
- Use of edible ingredients enhances flavor and safety
- Great for beginners and pros—techniques scale with skill
- Perfect combo of art and baking to impress friends/family
Essential Tools and Ingredients for Cupcake Flowers
Before diving into flower creation, gathering the right tools and ingredients ensures smooth workflow and professional-looking results:
| Tools | Purpose |
|---|---|
| Piping Bags | Hold and control the frosting |
| Flower Piping Tips (e.g., #104, #125) | Shape petals and leaves |
| Flower Nails | Support the flower as you pipe |
| Couplers | Allow quick tip changes |
| Spatula and Bench Scraper | Smooth and transfer frosting |
Ingredients:
- Buttercream Frosting: Holds shape well (classic butter, shortening blend, or meringue-based)
- Food Coloring: Gel colors provide vibrant hues without changing consistency
- Cupcakes: Basic vanilla or chocolate works great
- Optional Edible Decorations: Sprinkles, pearls, or edible glitter to enhance flowers
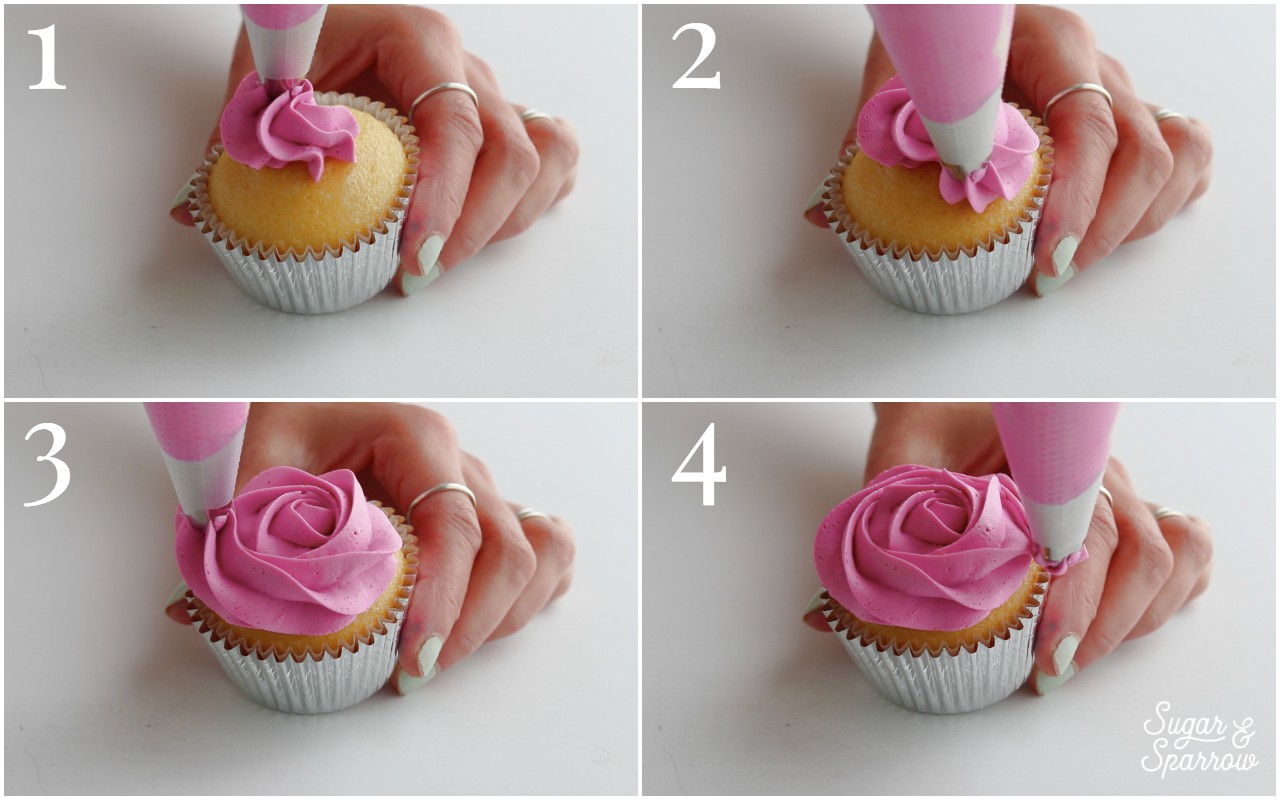
Step-by-Step: How to Make a Basic Buttercream Flower
This is the foundational technique for most piped cupcake flowers. We’ll look at piping a classic rose as a starting point. Once mastered, variations on petals and shapes become easy.
- Prepare the Buttercream: Make sure buttercream is smooth and stiff enough to hold shape, but not dry. Tint colors as desired.
- Fill Your Piping Bag: Fit the piping bag with a rose tip (# or #125), and fill it without air pockets.
- Insert the Flower Nail: Wrap it with a small square of parchment paper for easy flower removal.
- Pipe the Flower Center: Start with a small cone in the middle of the flower nail.
- Form Petals: Pipe petals around the cone. Hold the piping bag at a 45-degree angle, squeeze steadily, and rotate the nail in your other hand to form petals overlapping evenly.
- Remove the Flower: Freeze the flower on the nail for minutes, then carefully slide the parchment with flower off.
- Place Flower on Cupcake: Set frosting on cupcake base as glue, then position your flower. Optionally, add piped leaves with a leaf tip (#352).
Tips for Perfect Piping
- Maintain steady pressure while piping for uniform petals
- Practice on parchment paper before moving to nail
- Keep buttercream cold but pliable; if too warm, refrigerate briefly
- Use a turntable to help with smooth petal rotation
- Clean your tips regularly to prevent clogs
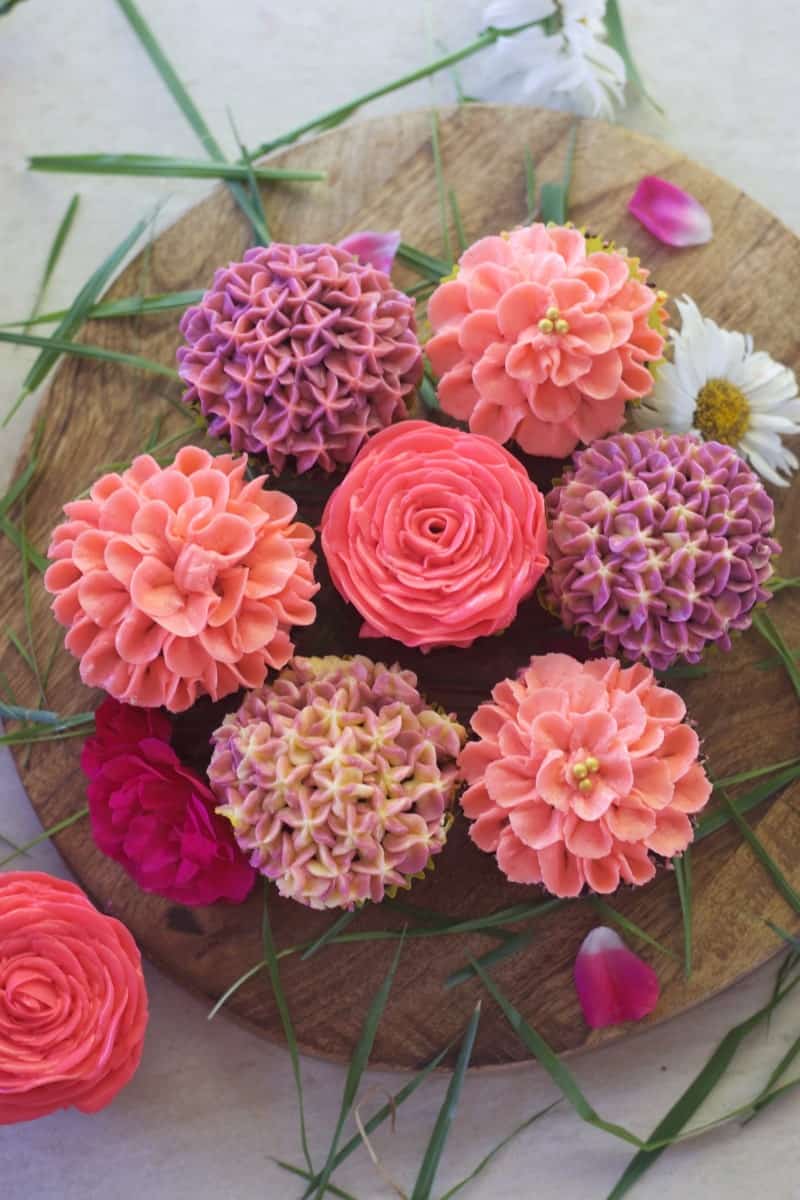
Expanding Floral Skills: Variety of Flowers You Can Try
Once you’ve mastered the classic rose, here are some exciting flower types to experiment with, each with simple tips:
| Flower Type | Best Piping Tip | Characteristic/Technique |
|---|---|---|
| Daisy | #366 | Thin, hollow petals radiating from dot center |
| Sunflower | # + Round Tip | Long yellow petals with small dot in center |
| Succulent | Petal tip + Leaf tip | Layered thick petals for 3D effect |
| Peony | # + Leaf tip | Dense overlapping petals with soft edges |
Case Study: How a Home Baker Created Floral Cupcake Magic
Jessica, a home baker from Seattle, had zero experience in cake decorating but wanted to make her daughter’s birthday cupcakes special. Starting with a basic buttercream rose tutorial, she dedicated a weekend to practicing. Within two days, she moved from shaky petals on parchment to beautiful multi-colored roses transferred onto cupcakes. Her guests were amazed, and Jessica's confidence soared.
Her secret? Reliable tools (quality tips and fresh buttercream), patience to practice small sections, and videos showing close-up piping actions. Jessica’s cupcakes became the highlight of the party, illustrating how simple dedication can transform a beginner into a cupcake flower artisan.
Frequently Asked Questions (FAQ)
Q1: What if my buttercream is too soft to pipe flowers?
Put it in the refrigerator for minutes, then knead gently to test firmness. If still soft, add more powdered sugar gradually to thicken. Avoid overheating the kitchen!
Q2: Can I use fondant instead of buttercream for flowers?
Fondant flowers are also beautiful but require different skills and tools. Piped buttercream flowers tend to be softer and more natural looking, while fondant provides smooth sculpted shapes.
Q3: How do I store finished decorated cupcakes?
Keep cupcakes refrigerated in a sealed container to preserve buttercream freshness. Remove from fridge minutes before serving for best texture.
Q4: Can I freeze buttercream flowers?
Yes! Freezing on parchment sheets, then transferring to airtight bags, helps maintain shape. Thaw gently before placing on cupcakes.
Q5: What if I don’t have flower nails or couplers?
Flower nails can be improvised with small bottle caps or foil squares on a stick. Couplers ease tip swaps but aren’t essential for beginners.
Bonus Tips for Stunning Flower Cupcakes
- Use multiple frosting colors: Tint various parts of petals slightly differently for realism.
- Mix flower sizes: Combine large blooms with smaller buds and leaves for natural effect.
- Practice leaf piping: Leaves frame flowers and complete the look.
- Try different frosting textures: Swiss meringue buttercream is silky and perfect for smooth petals.
- Experiment with edible glitter or luster dust: Add sparkle to flowers for special events.
Final Thoughts
Learning how to make a flower on a cupcake is a rewarding journey blending baking with artistry. It’s accessible to all skill levels and opens a world of decorative possibilities. Whether you stick with classic roses or create exotic succulents, the key is steady practice, quality materials, and a dash of creativity.
In your opinion, what flower would you love to master on cupcakes – or have you tried making edible flowers yourself? Share your experiences or questions below!